Skip to content

Free template

Client Welcome & Onboarding Pack

Start every new client the same organised way. Send a clear welcome document that tells them what happens next and what you need from them, and keep an internal checklist so nothing is forgotten before the work begins. Both come blank and as two completed examples.

Free download · No account needed

Which document do you need?

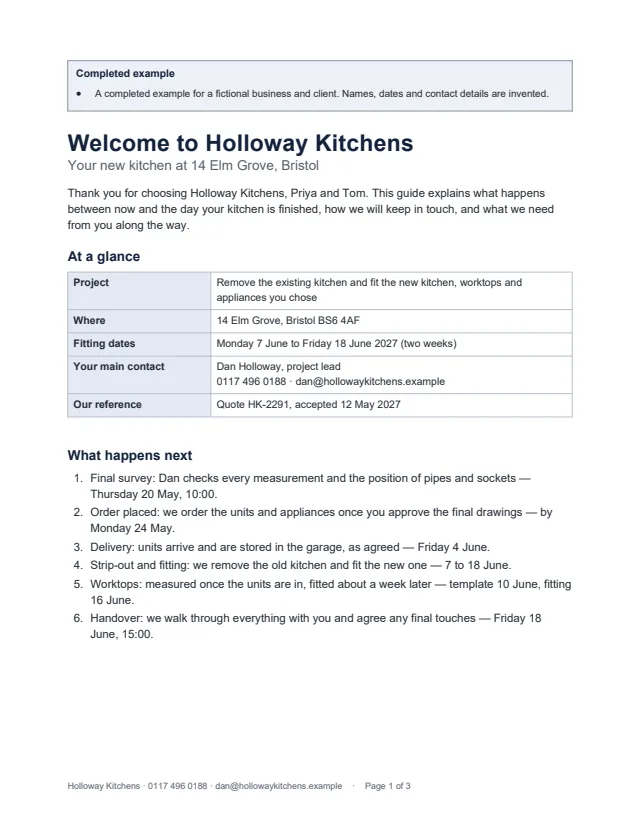
First page of the example welcome document for a kitchen installation: at a glance, and what happens next with dates Enlarge preview: Welcome document — for your client

Welcome document — for your client

Send it once the client has said yes, before the work starts.

What happens next, key dates, how you will keep in touch and how fast you reply, how to prepare, who does what, and how access will be arranged — without asking for passwords.

Blank and 2 examples · Word and PDF
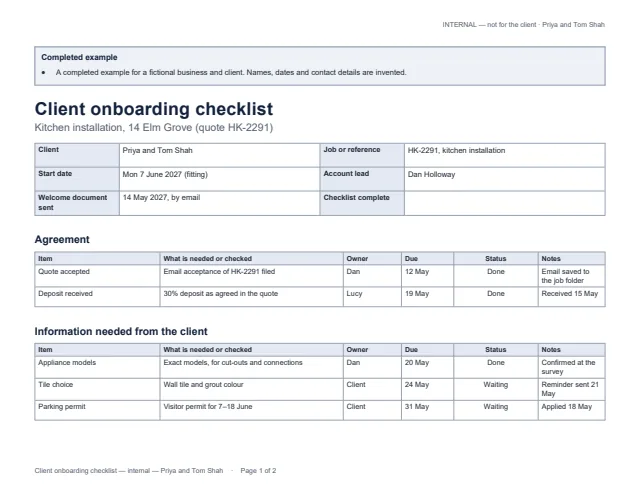
First page of the example internal onboarding checklist for a kitchen installation, with owners, due dates and statuses Enlarge preview: Onboarding checklist — internal

Onboarding checklist — internal

Keep it for your team; nothing on it goes to the client.

The agreement, the information you need from the client, approvals, access and setup, and the first steps — each line with an owner, a due date and a status of to do, waiting or done.

Blank and 2 examples · Word and PDF

Get the documents

Choose a document, a version and a format. After the first download, the others need no new form.

Document
Version
Format

You will get welcome-blank.docx

Word files open in Microsoft Word, Google Docs, Apple Pages and LibreOffice; we checked them in LibreOffice. The welcome document is US Letter portrait and the checklist US Letter landscape; change the paper size in your editor for A4. In the blank welcome document, replace the shaded [placeholders] and delete the instruction box before sending. The examples use invented businesses and clients.

How to use the pack

  1. When the client says yes, start a checklist and record the acceptance and any deposit.
  2. Fill in the welcome document with real dates, contacts and preparation steps, check it against the checklist, and send it.
  3. Work through the checklist with your team: give every line an owner and a due date, and mark lines “waiting” when you need something from the client.

What a good welcome document says

  • Dates the client can plan around, and what happens if one moves.
  • One main contact, the channel to use and how quickly you reply — plus what to do if something is urgent.
  • Exactly what the client must prepare or decide, and by when.
  • How access will be given, through invitations the client controls. Never ask for passwords.

Common questions

Why two documents instead of one?

They have different readers. The welcome document is written for the client: what to expect and what to do. The checklist is for your team: who is chasing what, and what is still waiting. Keeping them separate means internal notes never end up in front of a client.

How should a client give me access to their systems?

Through an invitation they control: most accounting, file-sharing and website tools let the owner invite another user and remove them later. The documents say you will never ask for passwords, and ask clients not to send passwords, PINs or door codes by email or text.

Can I use it for a one-off job as well as ongoing work?

Yes. The kitchen example is a two-week project with fixed dates; the bookkeeping example is a monthly service with a catch-up period first. Delete the sections that do not apply.

Is the welcome document a contract?

No. It explains how the work will run. The price, payment terms and the work itself belong in your quote, proposal or scope of work, which the welcome document refers to.